Automation Rules

Automation rules allow you to set up any workflow automation as needed. You can perform actions like adding assignees to tasks, sending out emails, etc., when tasks are created, updated, etc.

Creating Automation Rules

  1. Click on Projects from the left side pane.

  2. Click on the Project for which you want to set an automation rule.

  3. Click on Settings in the menu bar. If the visibility for more than three tabs are enabled in Tabs, Settings will be present inside the More tab.

  4. Click on the Automation rules card.

  5. Click on Add new rule.
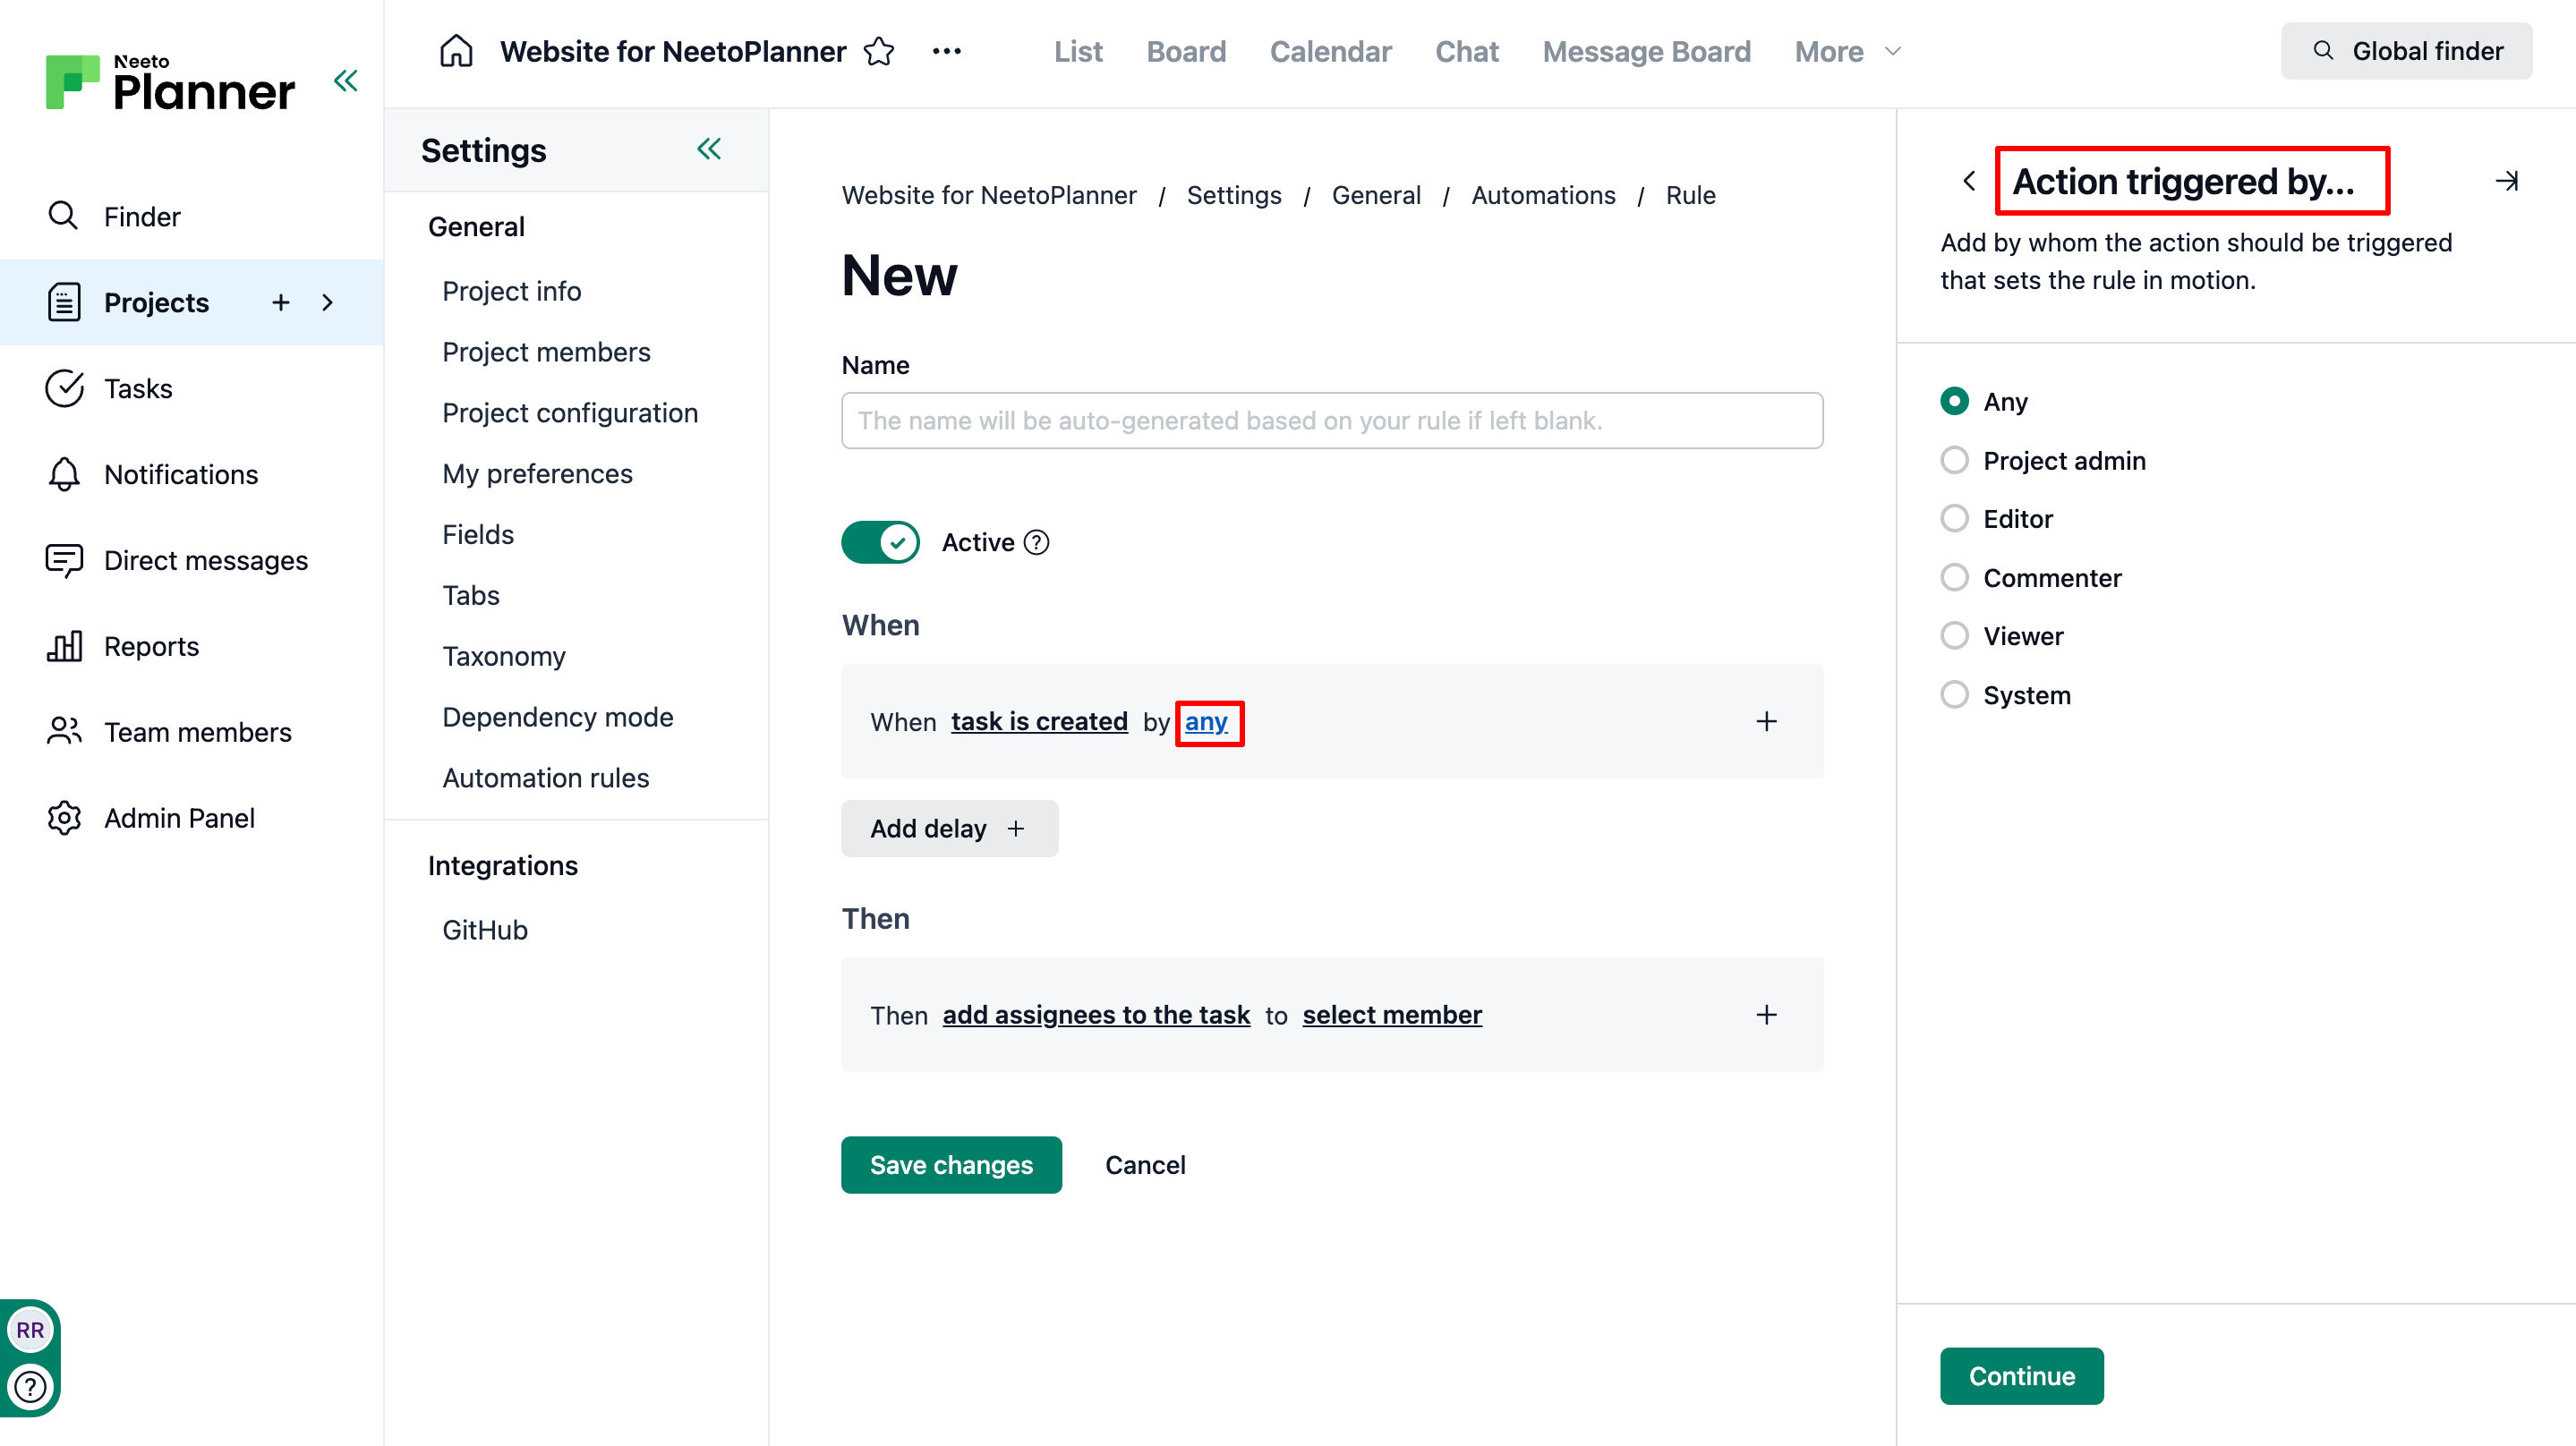
  6. Enter a Name.

  7. Under When trigger, click on Task is created and a right side pane appears.

  8. Select on one or more triggers.

  9. Click on Continue.

  10. Select who should trigger the action from Action triggered by... side pane to set the rule in motion.

  11. Click on Continue.

  12. To execute the Then action after a specified time, click on Add delay + icon.

  13. Enter the time and select the duration from the dropdown.

  14. Click on Continue.

  15. Under the Then section, click on add assignees to the task.

  16. A right side pane will appear and you can select the action that will take place as a result of the When trigger.

  17. Click on Continue.

  18. A different side pane appears where you can enter the required data depending on the Then action you choose. For.eg, if you selected email to all project members as the Then action, you will now see the side pane where you can enter the Subject and Body for the email.

  19. Fill in the required details or carry out the necessary steps to complete it.

  20. Click on Continue.

  21. Click on Save Changes.

    when_then_8rEBRpgdM.png

Automations form fields

When

When section contains two types of elements:

  1. Event

  2. Performer of the event.

Events

Events are the trigger points for automation rules.

Example: When task is created by any

Events supported by Automation Rules:

when_XxmVqbgTG.png
  • Task is created
    Triggered when a new task is created, all automations that have this event will be triggered.

  • Task is updated
    This event is triggered for any update made on the task, if you want to listen to specific updates on the task, you can use the following events:

    • Task name is changed

    • Task description is changed

    • Task section is changed

    • Task due date is changed

    • Task assignee is changed

  • Pull request is linked
    Triggered when a GitHub pull request is linked to the task, refer to this document on how GitHub integration works for more details.

  • Pull request is merged
    Triggered when a linked GitHub pull request is merged.

  • Pull request is closed
    Triggered when a linked GitHub pull request is closed.

  • Time trigger - Every hour
    All automations that use this event will be run every hour.

Performers

You can choose who should perform the event to trigger the automation.

any_npzkKwSva.png
  • Any
    Event performer could be anyone.

  • Project admin
    Event performer must be a Project admin for the selected project.

  • Editor
    Has access to add, edit, and delete anything within the project and can also invite and remove team members.

  • Commenter

    Can view the project and add comments to tasks and other elements.

  • Viewer

    Can view all project content but cannot add comments, edit anything, or make any changes.

  • System
    Event should be performed by one of the automations.

To know more about Project members and permissions, refer to this article.

Then

Then section contains two types of elements:

  1. Actions

  2. Add details

Actions

These are the actions that will be performed when the automation rule is executed.

For example: Then add comment to the task as note

Actions performed using automation:

then_5b7h58Pnt.png
  • Add assignees to the task

  • Email to task creator

  • Email to all project members

  • Email to task assignees

  • Email to

  • Add a checklists to the task

  • Add comment to the task

  • Change the task completed status

  • Change Checklist completed status

  • Change section of the task

Add details

This is for filling out the required details or carrying out the necessary steps to complete it

Options for Adding details for the above actions are:

select_member_3AjuHX4KH-.png
  • Select member for adding assignee to the task

  • Email( Enter subject and body for the email) for all Email actions

  • List ( add items to the list)

  • Note( for adding comment to the task)

  • Select value ( Complete or incomplete) for task and checklist completed status

  • Select value ( New Tasks, Working on it or Done) for change section of the task